On-premise Secure Environments
Staging/Test Server
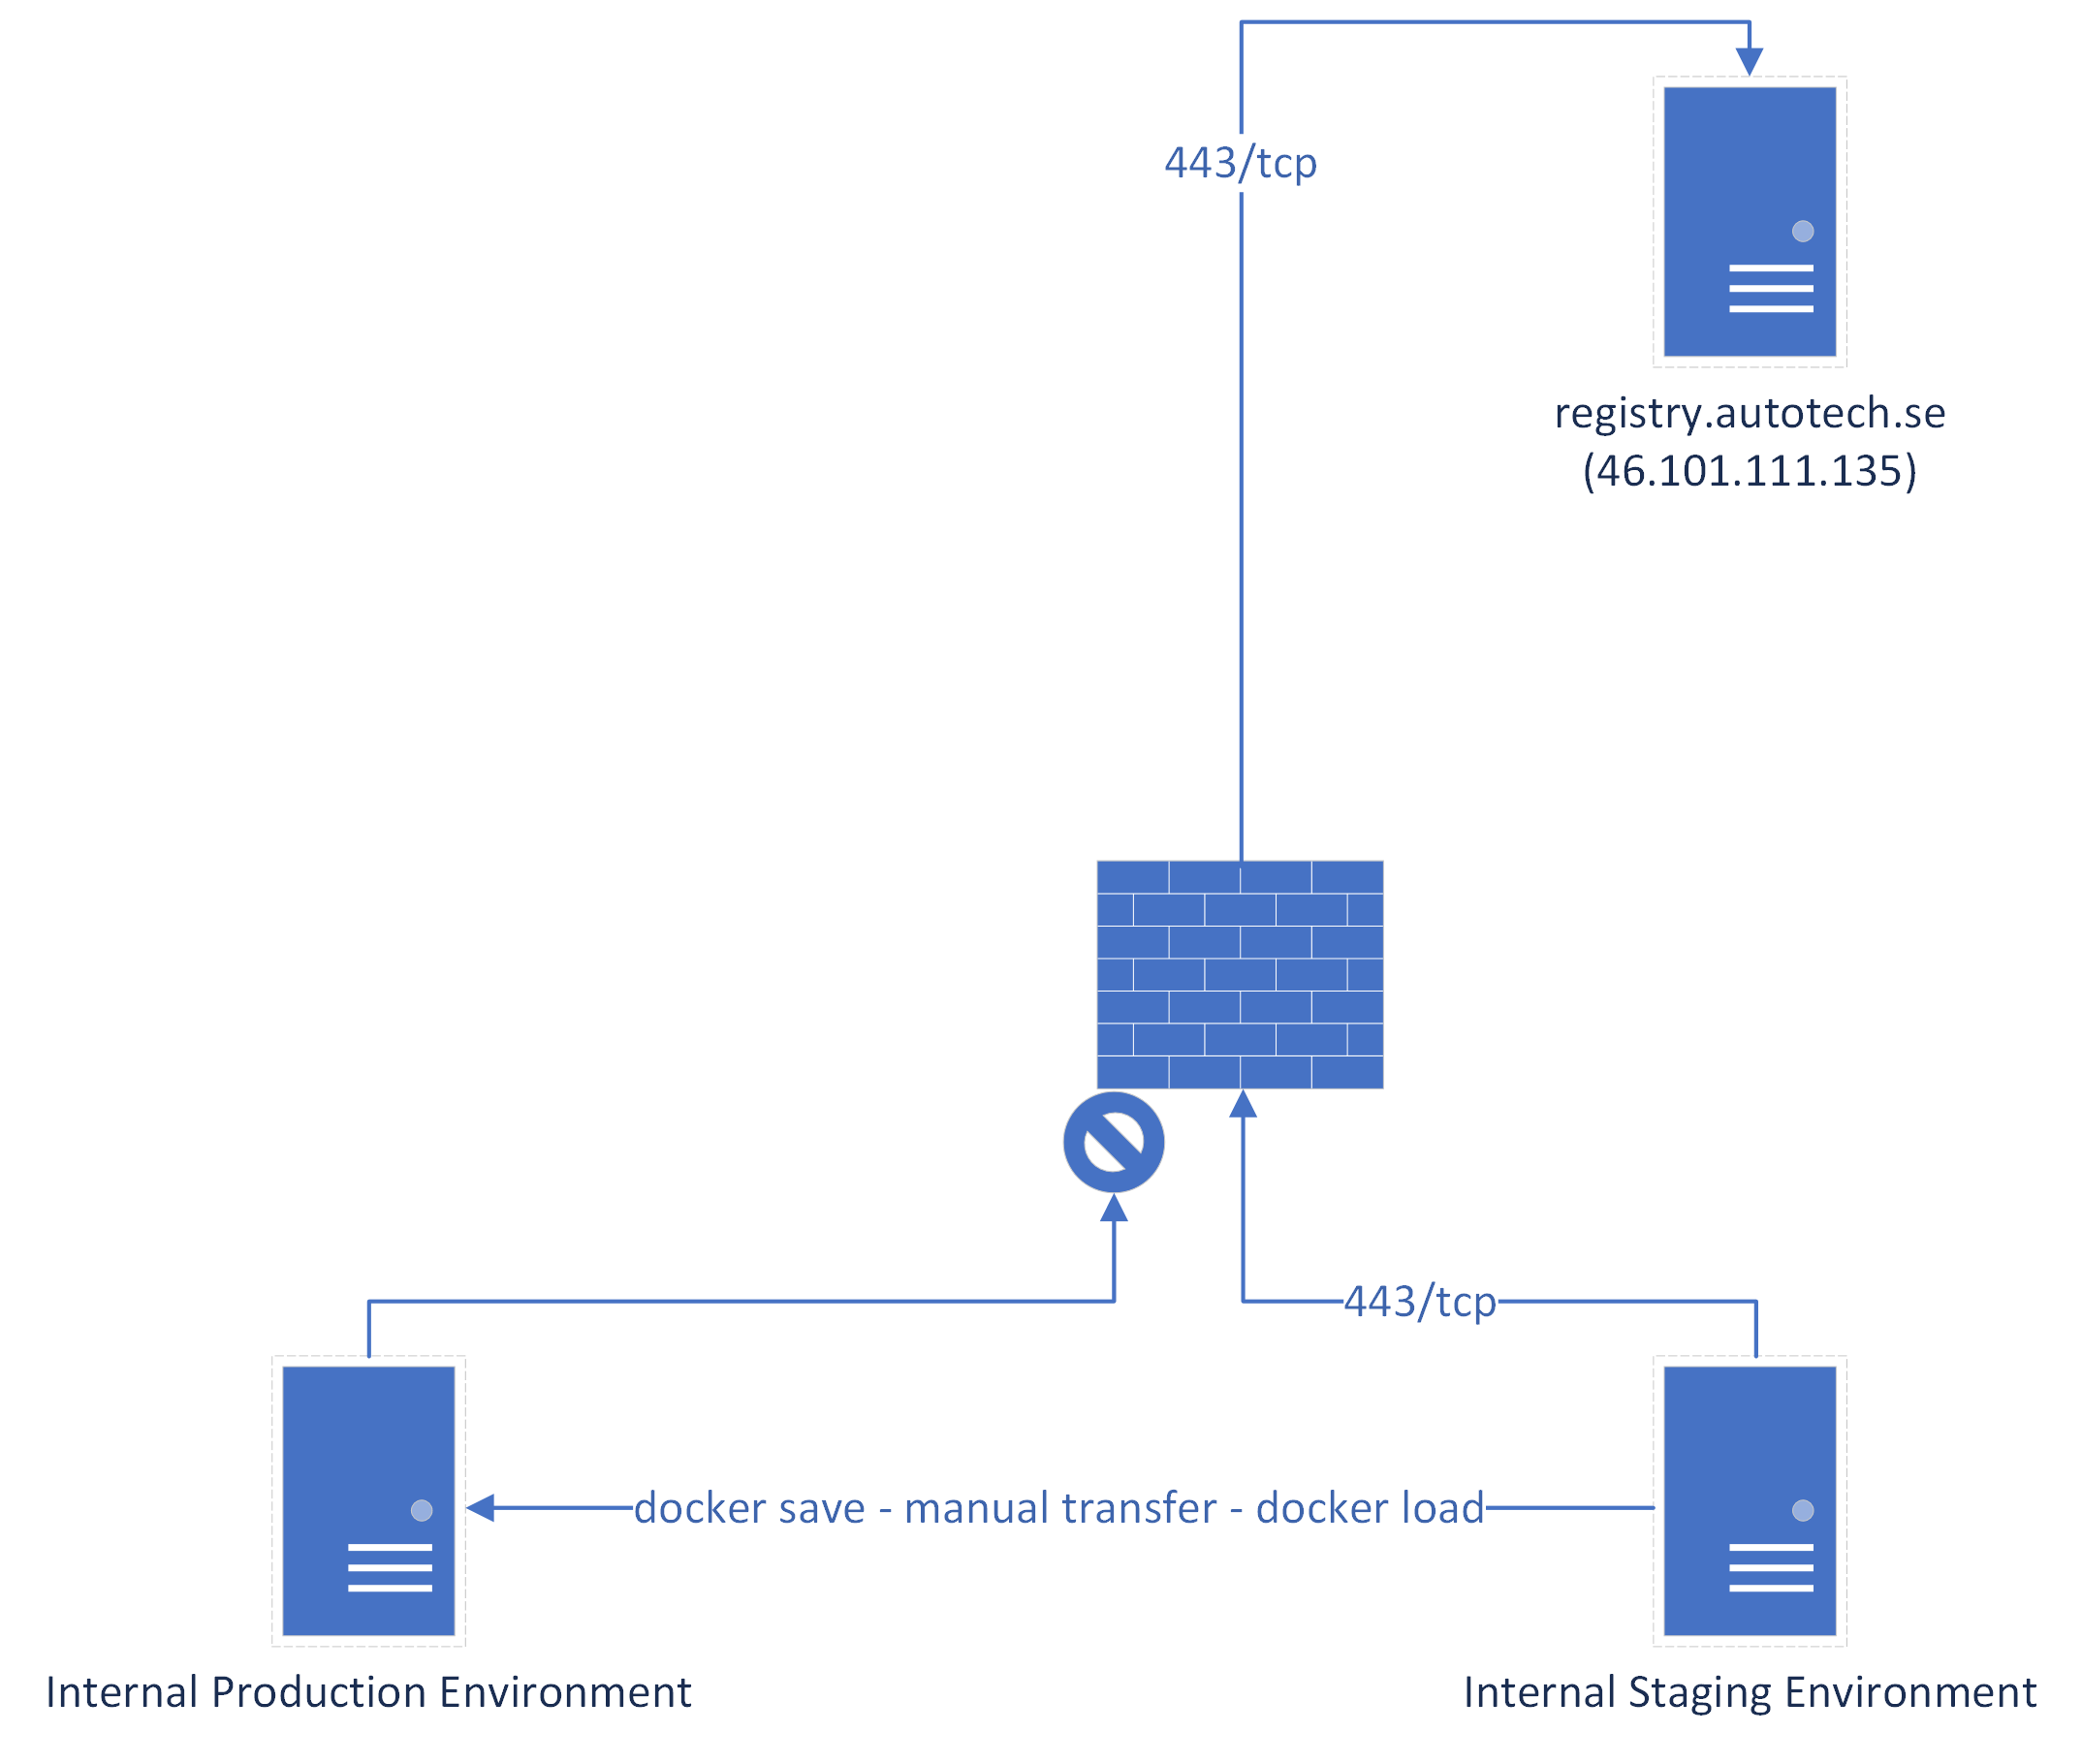
To get the best of both worlds (easy updates and security) our recommendation is to have one staging or test server that has our automatic updates turned on. That way you can receive updates when they are released, test and verify them, and then transfer the images to the production systems. The test/staging server doesn’t need unfiltered access to the internet it only needs to be able to connect to registry.autotech.se using TCP and port 443. The IP for registry.autotech.se is static (46.101.111.135) and not behind any CDN or similar.
A simple illustration of this layout (which also gives a hint on how updates are perfomed) looks like this:
Managing Updates Without Internet
Without internet access the process of keep images up-to-date becomes a bit more manual. While the production systems doesn’t need internet access at least one server somewhere needs to be able to access our registry and download the images. When that server has downloaded the images from our registry it’s possible to manually transfer them to the production systems. Here is a description on how to do it.
Exporting the images
When you are done with testing the images on the test/staging machine it’s time to export them so they can be transfered to the production machine. After they’ve been transfered there is no need to keep them on the test/staging machine.
docker save -o moodle.tar <your-moodle-image>
docker save -o moodle-cron.tar <your-moodle-cron-image>
Tip
These two commands will export the Docker images into the directory where you are currently standing. You can specify an absolute path if you have a specific folder where you want to store the results.
Transfering the images
Transfer both moodle.tar and moodle-cron.tar to the production machine using whatever method fits your environment the best.
Importing the images
Locate the folder where you stored the transfered files and run the following commands:
docker load --input moodle.tar
docker load --input moodle-cron.tar
The transfered images are now imported into the Docker environment on the production machine. Restart the docker-compose service to apply the update.
sudo systemctl restart docker-compose
There is no need to keep moodle.tar and moodle-cron.tar after this, you can safely delete them.
Proxied Networks
When Docker is running behind some kind of proxy that intercepts SSL-connections you might need to add the certicate for the proxy to Docker. We will give you a quick guide on how to get this up and running but more information can be found here: https://docs.docker.com/engine/security/certificates/.
Start by creating the folder where the certificate is to be stored. This folder have follow a strict format of registry:port so in our case we run this command:
sudo mkdir -p /etc/docker/certs.d/registry.autotech.se:443
Place your x509 for the CA in this folder and name it ca.crt.
/etc/docker/certs.d/registry.autotech.se:443/ca.crt
With this in place you should now be able to access the container registry.